Tracy’s Way – Exploring the Lab
 After several days of travel where the rough weather had us all lurching around a heaving and rolling ship like seasick zombies, we finally arrived at our first drilling location and started drilling rock core.
While all of the scientists on board the JR have their own areas of research and individual projects relating to the Expedition goals, as a team we are also responsible for collecting a lot of basic information about the cores we obtain. This information includes the depth the sediments come from, a visual description about the types of rocks and minerals present, identification of the fossilized remains of certain organisms to estimate the age of the deposits, measurement of paleomagnetic information to determine polarity, and a preliminary evaluation about the chemical composition of the water, gases, and sediments that are present in the core.
All of these measurements will help provide context for the more detailed analyses we will do for our individual projects after we leave the ship and return to our labs, and will assist other scientists who may sample the cores in the future. Therefore the measurements I am making on the ship are not the same type of measurements that I am interested in for my research project, but they are important anyway.
My job on the JR is as an inorganic geochemist. There are two of us on this ship, each working a 12 hour shift; I am on from midnight to noon, my counterpart works from noon to midnight. We are in charge of looking at certain chemical characteristics in the sediments and the water trapped in pores between the sediment grains (known as porewater). When the cores come up, they are put on the catwalk outside the core lab where the paleontologists, sedimentologists, and geophysicists are working. The lab technicians slice the cores into segments, and give us a small section for porewater analysis, which we take down to the next floor to the chemistry lab. The rest of the core goes into the core lab for everyone else to analyze.
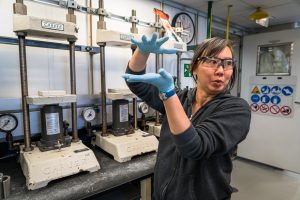
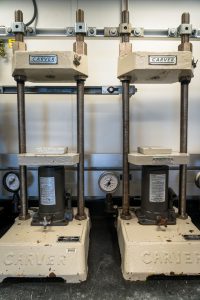
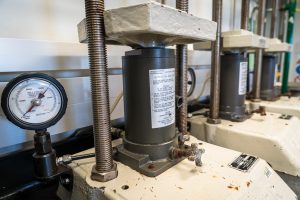
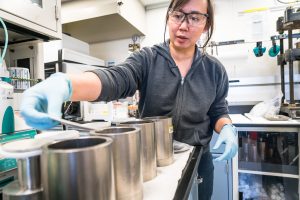
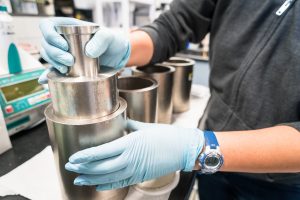
Once in the geochemistry lab, we scrape off the drilling mud, put the sample in a heavy titanium squeezer, and slowly squeeze out the porewater using a hydraulic press. We then use that porewater sample to look at various chemical parameters, including pH and the elements and ions present. This helps us figure out what chemical or biological processes are taking place. We share the chemistry lab with the organic geochemists, who look for traces of methane and measure the organic content of the sediments, among other things. Most of the samples from this site contain very little porewater, which means that we will have difficulty running all of our analyses, but we anticipate that this will change at the other sites. After all the samples have been measured for each site, we analyze the data, write up a report on our results, and the ship moves on to the next site.
Geochemistry labs tend to have a combination of geology and chemistry instrumentation and equipment, as well as some items not usually thought of as scientific tools. Here’s a pair of 5 things regarding items in various geochemistry labs I have worked in:
5 favorite scientific tools used in geochemistry labs:
1. small vials
2. laboratory label tape
3. pipetters
4. small bent-scoop spatula
5. vortexer
5 everyday items used as scientific tools in geochemistry labs:
1. aluminum foil
2. chopsticks
3. baking soda
4. hammers of various sorts
5. spoons