The Skinny on Thin Sections
A “thin section” of rock is a sample that is mounted to a microscope slide and cut so thin that you can see light through it. The process of creating a thin section is a blend of artistry, technology and science. It is also a bit of a dying art according to Emily Fisher, thin section specialist for Expedition 352.
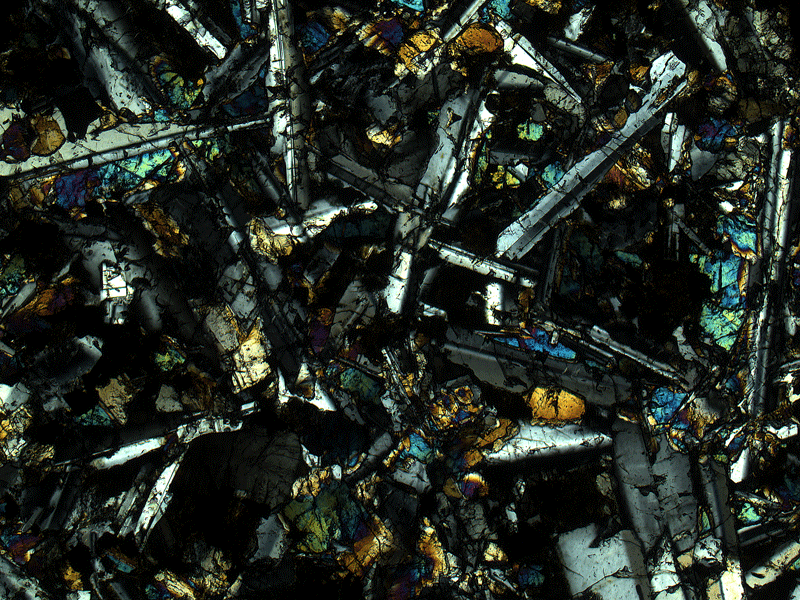
The art of preparing thin sections has been critical to understanding the core samples that scientists are observing. Thin section samples allow scientists to observe minerals in rocks, their crystal structure and texture at a microscopic level. This information can help identify the source of the lava that formed the rocks. Crystal size reveals information about the cooling history of the lava. A thin section of rock containing volcanic glass even revealed evidence of glass-consuming bacteria in a portion of core.
At the risk of over-simplifying a process that takes a minimum of 7 hours to complete just one thin section slide, let’s start with the “billet”. The billet is a 54x40x8-mm3 piece of rock carefully chosen by the science team as THE section requiring further observation.
Why such careful consideration in choosing a piece of rock? Due to the time involved in making thin sections, scientists may choose no more than twelve samples in a given day, allowing Emily the time to prepare each to her rigorous standards. The needs of all scientists on board must be kept in mind when limited to so few choices. If a piece of rock is removed from the core and used to make a thin section, the needs of all, from structural geologists to petrologists to geochemists, must be taken into account. Getting the biggest bang for the “billet” is key.
Both billet and slide must be carefully prepared prior to fixing the rock to the slide with an adhesive. The slide must be “frosted” to have a slightly rough texture and must be carefully measured to ensure that it is exactly the same thickness throughout its length and width. After the billet is “flattened” using an abrasive to grind away uneven edges, it is time to bond it to a frosted slide. A thin layer of resin is spread across the surface of the billet and the slide before the slide is carefully placed on the billet, removing any bubbles that would affect the quality of the thin section.
After the billet is affixed to the slide, it is cut off so only a 0.6 mm sample depth remains attached to the slide. As many as fifteen additional cuts reduce the rock’s thickness to no more than 0.2 mm thick. Depending on the hardness of the rock, what is left on the slide must then be ground away until the remnant of rock affixed to the slide is only 35-50 microns (0.035 – 0.050 mm). When a careful confirmation of consistent thickness across the sample is completed, the thin section is now ready for the finishing touch: a smooth polish to approximately 30-micron thickness, thinner than a sheet of paper. At this point, as light shines through the thin section, the viewer can see through the rock as if viewing a stained-glass window.
All of this careful preparation for a much-anticipated finished product makes the thin section technician invaluable on a hard rock cruise like Expedition 352.